Showing posts with label DIY. Show all posts

Saturday, March 7, 2015

Champagne Chiffon


When I'm designing, pure silk chiffon is my favorite fabric to work with. I cannot stand poor quality clothes like cheap satin or cheap chiffon. I only like to work with fabrics that look and feel great.
Silk chiffon is such a flirty, feminine fabric and I've used them in all my gowns, dresses and I've started incorporating them into ethnic wear as well.I love how floaty , lightweight and delicate they are.
I got this piece stitched last year when I got bored of normal ethnic outfits. This beautiful embroidered fabric on the top half of my outfit, was gifted to me and I've already make a midi skirt of of it and used the left over piece for the Bodice of this champagne anarkali jacket. While I originally got gold sequinned pants tailor-made for the top, I decided to mix it up with black for this post to add a bit of depth and some edginess.

Moving on, the weather is getting warmer now, and as my turtle necks and cable knits go back into hibernation, all my lighter, breathable clothes are taking place in the front row of my closet. I cannot wait to work with my favorite summer colors like white, tan and dusty shades of pinks and blues. What about you guys? Are you enjoying the start of summer or not?


Pin It

Thursday, May 8, 2014

DIY: Daisies and Cornflower blue nails

 Here's a quick and super easy nail art tutorial that will literally take 10 minutes. What's even better is that you needn't buy a fancy dotting tool, just pluck it out of an old hair brush!
Let's begin. You will need:

1) A base coat nail color of your choice. I suggest light or bright colors. Pastels will work well too.    I've used 2) OPI in "NLB83"- no room for the blues.
3) White nail polish. I've used LA girl in NL25-French White.
4) Yellow nail polish. I've used a cheap one I got free with some beauty supplies
5) Any transparent top coat. I've used Jordanna's Diamond boost hardener.
6) A comb like in the images below. This is for the dotting tool.
7) Optional- A glitter top coat.

Simply pull out a tooth from a hairbrush you aren't using. The brush should have these plastic balled tips on the ends. This will act as your dotting tool. Prep your nails with the base color and let them dry out completely. Then,on a small piece of paper, pour out some yellow color and dip the ball tip on the polish and press down on your finger nail. Depending on how many flowers you want, space the yellow dots slightly far apart from each other. Three flowers on one nail are good, any more, and it will be crowded. I usually go for two on the top right corner of the nail and one on the bottom left. Next, clean the dotting tool of any yellow polish and dip it into some of the white that you have poured out. Press down on your nail around the yellow dot to create the petals. You can make two dots before dipping it into the white polish again. Do not press down the dots too close to each other. After your petals are done, let it dry out completely before you put a top coat.
Alternatively, you can do a red flower on a black base color or even metallic flowers on a white base color. Get creative and even use some glitter or a stone in the center of your flower. And you've got salon- finished nails under 10 minutes in the convenience of your home!


Pin It

Tuesday, April 15, 2014

The much awaited...

So as promised back in February, Here are a few images from my sister's wedding! The entire theme was ivory, gold and purple all based around the bride's favorite color.
The event was beautifully planned and taken care of by the amazing wedding planners at APSHAR. From location, to the food , from intricate floral decor pieces to the cake, all were arranged by the planners after my sister had given them an idea of what her dream wedding was to look like. Needless to say, everything ended up spectacular on the big day and exactly what my sister wanted!
Moving on, let's forward back to my DIY Bridal Veil post from February. Below is an image of how the veil looked on the bride. Double layer, floor length tulle in Ivory and french lace trimmings! Easily an heirloom piece, me thinks!

I have wedding fever at the moment .Sigh.


Bridal Gown: Rosa Clara, Veil: Handmade. Hair and Makeup: Lavish 

Sunday, February 23, 2014

DIY: Easy Bridal Veil

 Bride on a budget? No problem! Bridal accessories can be quite expensive and what better way to cut down on costs by creating one yourself? I made my sister's bridal veil and it's no surprise that she looked stunning!
These 5 easy steps teach you how to make a bridal veil for yourself or a loved one!

 You will need:

  • 2 1/2 meters of  FINE ivory tulle. (depending on the length of the veil to suit the bride and depending on the color of the bridal gown).
  • A tiara / crown comb. I've used a comb.
  • Lace ribbon- color to match the tulle.
  • Needle, thread and scissors.
  • Sewing machine.
  • Iron on crystals and a be-dazzler (Optional)

 Start by cutting the edges of the fabric you are using into curved ends. Do this neatly and evenly. Then fold in half meter of the fabric or the desired length that will cover the bride's face.

With the fold neat and even, Use a strong white thread and run a stitch to secure the fold in place.Make sure that the loose end of the thread is knotted big so it doesn't escape through the tiny holes in the net. Pick up both layers to secure and after reaching the end, pull the fabric and gather the net and knot the gathers . The body of the veil is now ready.

TIP( TSCT Recommends): If you want some of the fabric to cover the sides of the face, instead of starting the running stitch from the ends, start only midway so that the gathers are only in the center of the fabric like so: 

You may choose to sew on the tiara to the gathers now, or you may leave it till the end. This is up to you as some find it easier to sew on the fabric to the tiara in the end.
I have already attached the gathers to the comb by hand sewing the veil in place.


The last step is to machine stitch the lace ribbon to the ends of the tulle so that the raw selvages are covered and stay hidden. I've machine stitched it because the veil I created for my sister was very long. If you want to have a shorter veil and don't know how to use the machine, you may hand sew the lace neatly.

Optional: If the tiara you have picked is very light and you want some added glam factor, you can use iron on stones and stick these on the veil, away from each other so that the stones sparkle in the light.
Make sure the tulle can withstand the heat and pressure of iron on stones before fixing them on.

P.S: Once the professional pictures of the wedding are out, I'll post one so you guys can see the veil on the bride!

Pin It

Tuesday, April 23, 2013

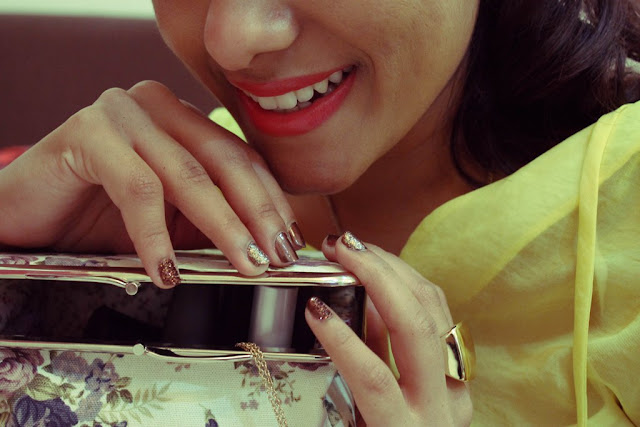
Glitter Chocolate nails


I love wearing glitter nails, but sometimes its so hard to find a good glitter nail polish that actually looks like glitter and sparkles. So I decided to use fine glitter eye shadow powder on my nails instead of polish and the results are brilliant!
Before we begin, let me point out that you will want to use very fine powder, preferably eye shadow glitter.

You will need:
Nail polish and eye shadow glitter in matching colors, or not- your call,Top coat- glossy,Q tips and a brush.,Small square paper to dust on glitter.
1. Paint your nails and let them dry. 2 coats and seal. Pick a nail youb want to use the glitter on and apply one more coat of color. Do not wait for it to dry!
2. Place your finger on the small square of paper and immediately pick up some glitter dust and dust it on the nail, ensuring all areas are covered. Press down slightly your thumb.
3.Dust off excess powder with a brush or by gently blowing on the nail. Stubbon dust can be taken off using a Q tip and some remover.
4. Do not waste the glitter powder left back on the paper, fold and drop back in the remaining dust into the glitter pot.
5. Apply top coat on all other nails except the glitter nail to give it a much more 'popped out' effect!


                                                                              Pin It

Monday, January 14, 2013

DIY - Pimp my Bling.


I had to attend a friend's wedding recently and I realized I had no earrings to match my green-blue-gold saree. So I awakened the awesomeness in me and created my own pair. Here's what I did:

     You will need:
  • A pair of  earrings you want to modify
  • A few glass beads
  • An old earring
  • Needle
  • Thread
  • I'd say scissors, but hey, teeth will do!


Hope this picture tutorial helped. Make your own and let me know how they turn out. Remember to get creative with whatever you have at home !

xxoo


                                                                                Pin It